Table of Contents:
- Introduction to Custom Post Types
- Why Use Custom Post Types?
- Creating Custom Post Types
- Step 1: Decide on the Purpose and Functionality of Your Custom Post Type
- Step 2: Choose a Unique and Descriptive Name
- Step 3: Define Labels and Descriptions
- Step 4: Set Up Custom Post Type Arguments
- Step 5: Register Your Custom Post Type
- Customizing the User Interface
- Changing the Menu Icon
- Removing Meta Boxes
- Adding Custom Meta Boxes
- Creating Custom Columns
- Adding Custom Taxonomies
- Displaying Custom Post Types on Your Website
- Using Shortcodes
- Creating Custom Templates
- Conclusion
Introduction to Custom Post Types
One of the most powerful features of WordPress is its ability to create custom post types. By default, WordPress comes with the ability to create posts and pages, but with custom post types, you can create anything you want. This could be a portfolio of your work, a directory of businesses, or even a recipe collection. The possibilities are endless.
Why Use Custom Post Types?
There are several reasons why you might want to use custom post types in your WordPress site. Here are a few:
- Custom post types allow you to separate content into different sections, making it easier for users to find what they’re looking for.
- You can customize the user interface for your custom post type, making it easier for users to add and edit content.
- Custom post types can be used to create unique templates for displaying your content. This can be especially useful for creating a portfolio or directory.
- Custom post types allow you to add custom fields to your content, giving you more control over the data you’re collecting.
Creating Custom Post Types
Now that you know why you might want to use custom post types, let’s take a look at how to create one.
Step 1: Decide on the Purpose and Functionality of Your Custom Post Type
Before you start creating your custom post type, it’s important to have a clear idea of what you want it to do. This will help you decide on the right arguments and settings to use when creating your custom post type.
Step 2: Choose a Unique and Descriptive Name
Next, you’ll need to choose a unique and descriptive name for your custom post type. It’s important to choose a name that accurately reflects the purpose of your custom post type and that is easy to understand.
Step 3: Define Labels and Descriptions
After you’ve chosen a name, you’ll need to define labels and descriptions for your custom post type. These will be used in the WordPress admin interface to help users understand what the custom post type is for.
Step 4: Set Up Custom Post Type Arguments
Once you’ve defined the labels and descriptions for your custom post type, you’ll need to set up the arguments that control the functionality of your custom post type. Some of the important arguments include:
- ‘public’ – determines whether the custom post type is public or private.
- ‘has_archive’ – determines whether the custom post type has an archive page.
- ‘supports’ – determines which features are enabled for the custom post type (such as the title and editor).
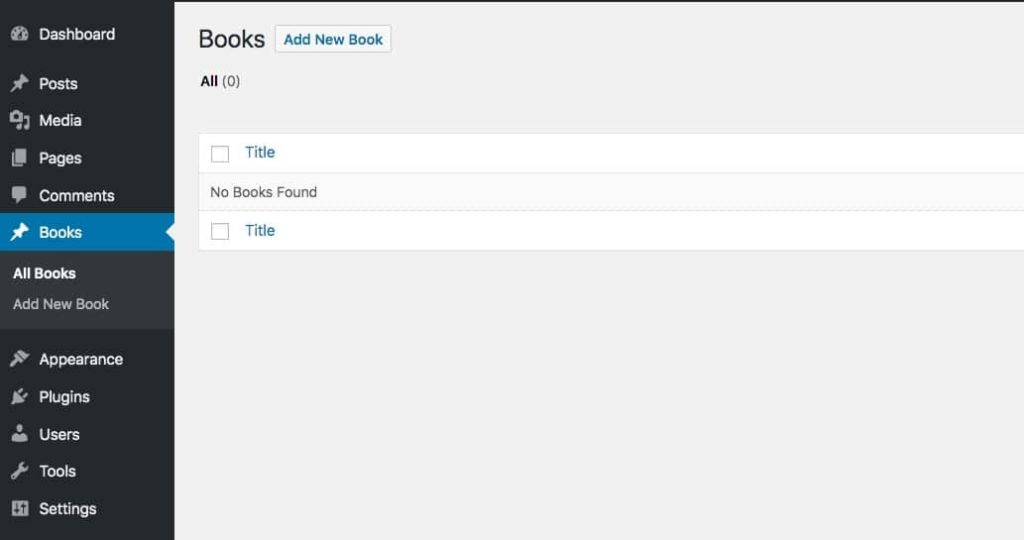
Step 5: Register Your Custom Post Type
Once you’ve set up all of your arguments, you’re ready to register your custom post type. To do this, you’ll need to use the register_post_type function. Here’s an example of how you might use this function:
function register_my_custom_post_type() {
    $args = array(
        'labels' => array(
            'name' => 'Books',
            'singular_name' => 'Book',
            'add_new_item' => 'Add New Book',
            'edit_item' => 'Edit Book',
            'new_item' => 'New Book',
            'view_item' => 'View Book',
            'search_items' => 'Search Books',
            'not_found' => 'No books found',
            'not_found_in_trash' => 'No books found in trash',
            'parent_item_colon' => 'Parent Book:',
            'all_items' => 'All Books',
            'archives' => 'Book Archives',
            'insert_into_item' => 'Insert into book',
            'uploaded_to_this_item' => 'Uploaded to this book',
            'featured_image' => 'Book Cover Image',
            'set_featured_image' => 'Set book cover image',
            'remove_featured_image' => 'Remove book cover image',
            'use_featured_image' => 'Use as book cover image',
            'menu_name' => 'Books',
            'filter_items_list' => 'Filter books list',
            'items_list_navigation' => 'Books list navigation',
            'items_list' => 'Books list',
        ),
        'public' => true,
        'has_archive' => true,
        'supports' => array('title', 'editor', 'author', 'thumbnail', 'excerpt', 'comments'),
        'taxonomies' => array('category', 'post_tag'),
        'rewrite' => array('slug' => 'books'),
        'menu_position' => 5,
        'menu_icon' => 'dashicons-book',
    );
    register_post_type('book', $args);
}
add_action('init', 'register_my_custom_post_type');
Customizing the User Interface
Customizing the user interface of your custom post type can help make it easier for users to add and edit content, and can also make your site look more professional and polished. There are a few different ways you can customize the user interface:
Changing the Menu Icon
You can change the icon that appears in the WordPress admin menu for your custom post type by using the menu_icon argument in the register_post_type function. For example, you might use the following code to set the icon to a book:
'menu_icon' => 'dashicons-book',Removing Meta Boxes
You can remove the default meta boxes that appear in the WordPress editor for your custom post type by using the remove_meta_box function. For example, you might use the following code to remove the author meta box:
function remove_author_meta_box() {
    remove_meta_box('authordiv', 'book', 'normal');
}
add_action('admin_menu', 'remove_author_meta_box');
Adding Custom Meta Boxes
In addition to removing the default meta boxes, you can also add your own custom meta boxes to the WordPress editor for your custom post type. To do this, you’ll need to use the add_meta_box function. Here’s an example of how you might use this function to add a custom meta box for storing a book’s ISBN:
function add_isbn_meta_box() {
    add_meta_box(
        'isbn_meta_box', // ID
        'ISBN', // Title
        'display_isbn_meta_box', // Callback function
        'book', // Post type
        'side', // Context
        'default' // Priority
    );
}
add_action('add_meta_boxes', 'add_isbn_meta_box');

function display_isbn_meta_box($post) {
    $isbn = get_post_meta($post->ID, 'isbn', true);
    echo '<label for="isbn">ISBN:</label>';
    echo '<input type="text" id="isbn" name="isbn" value="' . esc_attr($isbn) . '" size="25" />';
}
Creating Custom Columns
You can also customize the columns that appear in the list view of your custom post type in the WordPress admin interface. To do this, you’ll need to use the manage_edit-{post_type}_columns and manage_{post_type}_custom_column filters. Here’s an example of how you might use these filters to add a custom column for displaying a book’s ISBN:
function add_isbn_column($columns) {
    $columns['isbn'] = 'ISBN';
    return $columns;
}
add_filter('manage_edit-book_columns', 'add_isbn_column');

function display_isbn_column($column, $post_id) {
    if ($column == 'isbn') {
        $isbn = get_post_meta($post_id, 'isbn', true);
        echo $isbn;
    }
}
add_action('manage_book_posts_custom_column', 'display_isbn_column', 10, 2);
Customizing the user interface of your custom post type can greatly improve the experience of adding and editing content, and can also give your site a professional and polished look. By using the techniques described in this section, you can change the menu icon, remove and add meta boxes, and create custom columns for your custom post type in the WordPress admin interface.
Adding Custom Taxonomies
In addition to creating custom post types, you can also create custom taxonomies to organize your content. Custom taxonomies work in a similar way to the default categories and tags in WordPress, but they can be used to create more specific and targeted groupings of content.
To create a custom taxonomy, you’ll need to use the register_taxonomy function. Here’s an example of how you might use this function to create a custom taxonomy for book genres:
function register_book_genre_taxonomy() {
    $args = array(
        'labels' => array(
            'name' => 'Genres',
            'singular_name' => 'Genre',
            'search_items' => 'Search Genres',
            'all_items' => 'All Genres',
            'parent_item' => 'Parent Genre',
            'parent_item_colon' => 'Parent Genre:',
            'edit_item' => 'Edit Genre',
            'update_item' => 'Update Genre',
            'add_new_item' => 'Add New Genre',
            'new_item_name' => 'New Genre Name',
            'menu_name' => 'Genres',
        ),
        'hierarchical' => true,
        'rewrite' => array('slug' => 'genre'),
        'show_ui' => true,
        'show_admin_column' => true,
        'query_var' => true,
    );
    register_taxonomy('genre', 'book', $args);
}
add_action('init', 'register_book_genre_taxonomy');
Displaying Custom Post Types on Your Website
Now that you’ve created your custom post type and taxonomies, you’ll want to display your content on your website. There are a few different ways you can do this:
- Using Shortcodes
One option is to use shortcodes to display your custom post type content. WordPress comes with a built-in shortcode for displaying posts, which you can use like this:
[posts post_type="book"]You can also use the `get_posts function to create your own custom shortcode. This function allows you to specify a variety of arguments to control which posts are displayed, such as the number of posts to show, the order they should be displayed in, and any taxonomy terms they should be filtered by. Here’s an example of how you might use this function to create a custom shortcode for displaying the latest 5 books in the “mystery” genre:
function books_shortcode($atts) {
    $atts = shortcode_atts(array(
        'post_type' => 'book',
        'taxonomy' => 'genre',
        'term' => 'mystery',
        'posts_per_page' => 5,
        'orderby' => 'date',
        'order' => 'DESC',
    ), $atts);

    $query = new WP_Query($atts);

    if ($query->have_posts()) {
        $output = '<ul>';
        while ($query->have_posts()) {
            $query->the_post();
            $output .= '<li><a href="' . get_the_permalink() . '">' . get_the_title() . '</a></li>';
        }
        $output .= '</ul>';
        wp_reset_postdata();
        return $output;
    }
}
add_shortcode('latest_books', 'books_shortcode');
You can then use this shortcode in your posts and pages like this:
[latest_books]- Creating Custom Templates
Another option for displaying your custom post type content is to create custom templates. This is especially useful if you want to create a unique layout for your content that cannot be achieved using shortcodes alone.
To create a custom template, you’ll need to create a new file in your theme’s directory and name it according to the template hierarchy. For example, to create a custom template for single book posts, you might create a file called single-book.php.
In your template file, you can use the WordPress template tags and functions to display the content of your custom post type. Here’s an example of how you might create a custom template for single book posts:
<?php
get_header();

if (have_posts()) {
    while (have_posts()) {
        the_post();
        ?>
        <h1><?php the_title(); ?></h1>
        <div class="book-cover">
            <?php the_post_thumbnail(); ?>
        </div>
        <div class="book-meta">
            <p>Author: <?php the_author(); ?></p>
            <p>ISBN: <?php echo esc_html(get_post_meta(get_the_ID(), 'isbn', true)); ?></p>
        </div>
        <div class="book-content">
            <?php the_content(); ?>
        </div>
        <?php
    }
}

get_footer();
?>
Conclusion
In this guide, we’ve covered the basics of creating custom post types in WordPress. We’ve looked at the benefits of using custom post types, how to create them, and how to customize the user interface and display them on your website. With the knowledge you’ve gained in this guide, you should now be able to create your own custom post types and use them to add unique and powerful features to your WordPress site.
Remember, custom post types can be used for a wide range of purposes, so don’t be afraid to get creative and think outside the box. And if you’re ever stuck or need help, there are plenty of resources available online, including the WordPress Codex and various forums and communities.
I hope this beginner’s guide to creating custom post types in WordPress has been helpful and that you’re now ready to start creating your own custom post types. Good luck!