
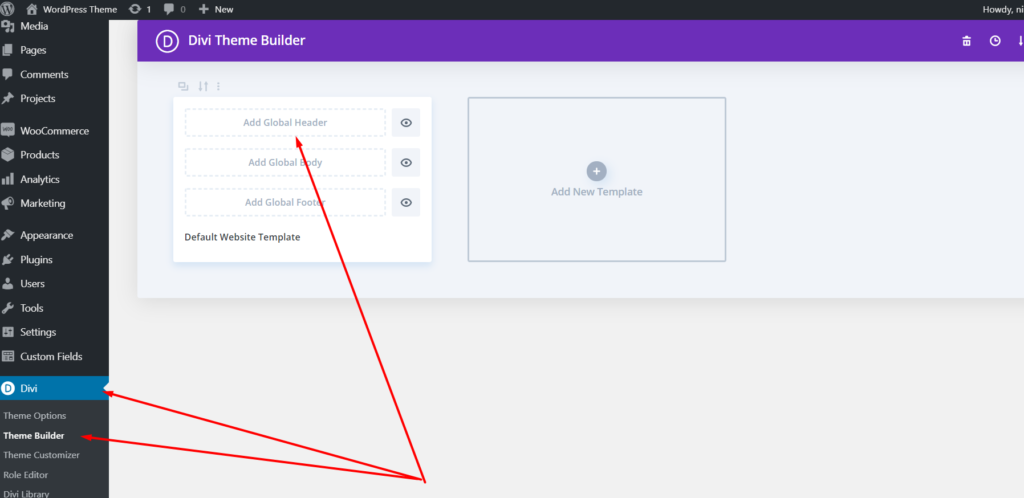
- Go to the Divi -> Theme Builder and then choose Add Global Header.
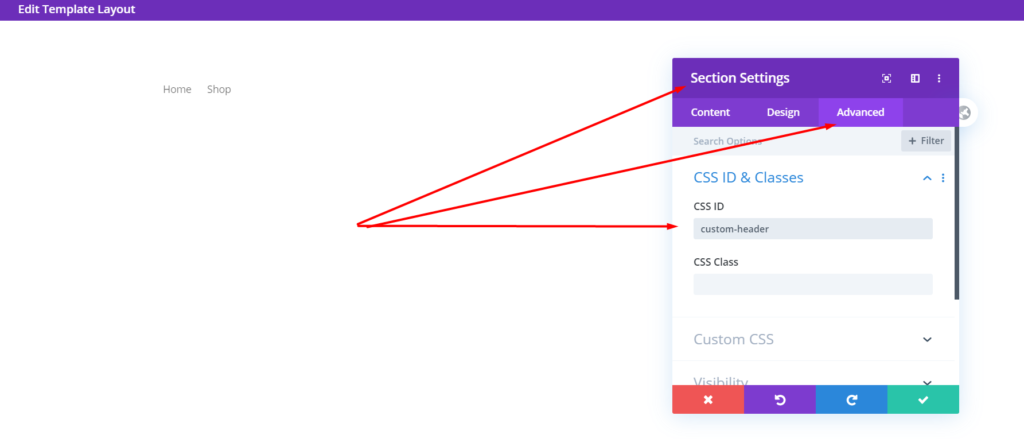
2. Go to the Section Setting and add the ID.
3. Go to Divi -> Custom CSS and add this CSS code:
#custom-header {
  width: 100%;
  z-index: 999999;
}
4. Go to Divi -> Integration -> Add code to the < head > of your blog and add this JavaScript code:
<script>
    function scrollFunction() {
	let customHeader = document.getElementById('custom-header');
    	let bodyRect = document.body.getBoundingClientRect();
    	offset = bodyRect.top;
	if(offset < -300) {
	    customHeader.style.top = '0';
	    customHeader.style.position = 'fixed';
	} else {
	    customHeader.style.top = '';
	    customHeader.style.position = '';
	}
    }

    window.onscroll = function() {scrollFunction()};
</script>
5. After you style the menu, you should get something like this.
And this is how easily you can make the header sticky in the new Divi Theme Builder.